Installation Instructions...
Thank You for your interest in our software product...
Note: By getting to this
installation page, we assume that you have already installed SQL
Server and you're ready to install from Steps 3 and 4 or you are
installing a client.
Note: for most users, keep the
installations simple by accepting all default options...
Contents Index:
-
Section Two -
Installing ProServe 2012
(Client) from Download...
-
Section Three -
Un-Installing ProServe 2012 (Server or Client)
Step 4 (from the Runtime Installation Page) ProServe 2012
Software and Databases...
- Click the link from the Installation Page (Step 4)
-
Follow installation prompts below to complete
installation...

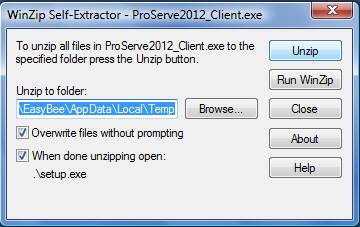
Accept all default options and click Unzip...
Note: Do NOT change any default
options here...
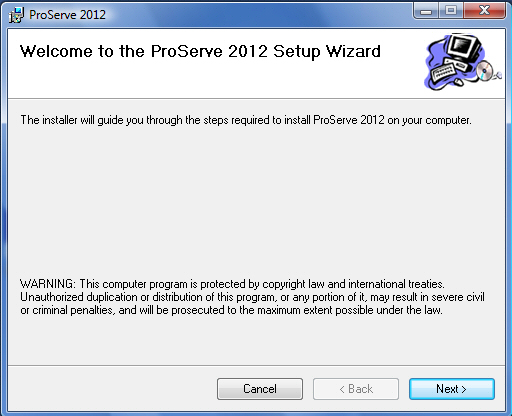
After the WinZip Self-Extractor runs, select Next...
Note: you may be prompt to install other Microsoft
software programs,
if so, please allow
installation...
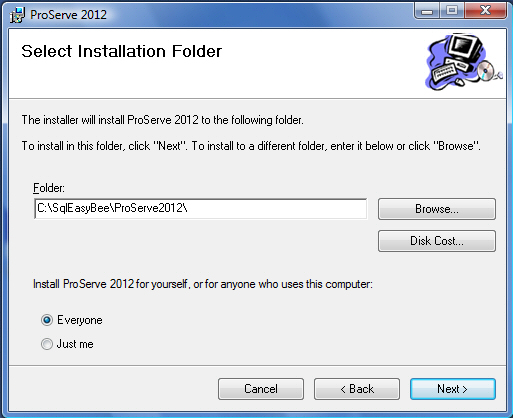
Note: This Installation Folder section is very
important...

Note: The installation folder
should be left as is,
unless you completely understand SQL Server...
The idea is; you can Share the SqlEasyBee folder
on your Server or Main Computer for networks after installation...
For Single users - this default folder is perfect, no reason to
change it...
Click Next to complete part one
of this installation...
After installation, you will find a new shortcut on your desktop...
Do NOT start ProServe 2012 yet...
Step 5 (from the Runtime Installation Page) EasyBee Software
SetConfig
Running SetConFig for the 1st time...
SetConFig is a
System Configuration
Setup Utility
that has several purposes:
-
It allows you to Setup the Configuration File
so ProServe 2012 can connect to its databases.
-
It's used to Attach, Detach
and Reattach the ProServe 2012 Databases to the
host SQL Server Instance.
-
It also is used to Rebuild ProServe 2012
log files.
-
For Networks, it's used to setup
Clients
for access to the shared ProServe 2012
application on the server.
Important: The SetConFig must
"Run as Administrator" in order to
attach the ProServe 2012 databases for the 1st time..
... After that, you can run from EasyBee Software folder under
Start/All Programs...
Instead of running this from the Installation Page
please follow instruction below to run SetConFig as
administrator for
the 1st time...
-
Open your Windows Explorer and locate
SqlEasyBee folder on drive C: as shown below...


Then double click the ProServe2012 folder and
locate SetConFig file...

Right Click SetConFig and then select
Run
as Administrator
Make sure it's the one with the icon as shown above...
- Follow instructions below to complete Setup...
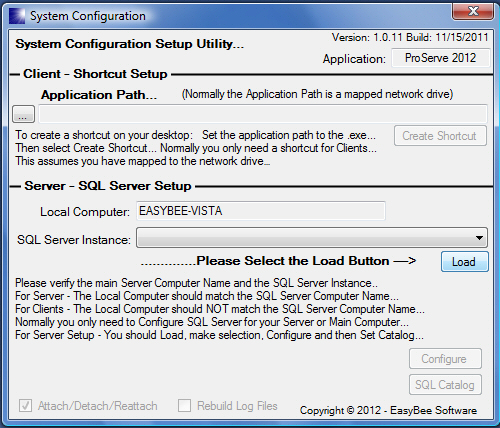
Select Load and wait until SQL Server Instance has
loaded...
This may take 10 or more seconds to complete...

After SQL Server Instance has loaded, select one...
For most users there will only be One...
Follow instructions on Screen by Selecting Configure
1st
and then SQL Catalog 2nd...
Leave all other options as is...
Close SetConfig when completed...
 ... You're now ready to double click the ProServe 2012
icon on your desktop...
... You're now ready to double click the ProServe 2012
icon on your desktop...
Note: If you need to run SetConFig
again (and you will) you should not have to Run as Administrator...
Default Username and Password...
- Username: Admin
- Password: admin
- ...
- Both are lowercase and uppercase sensitive...
Stop Here - You are done....
Section Two - (Steps 3 and 4 from the
Runtime Installation Page)
Installing ProServe 2012 (Client)
Note: This installation is only required for
networks and should only be installed on machines (clients) other than
the Server or Main Computer hosting SQL Server and
ProServe 2012.
This is the SetConfig Utility program installation that's the same
program from Server installation above...
Note: SQL Server Installation is NOT required
for Clients...
- Click the link from the Installation Page (Step 3)
-
Follow installation prompts below to complete
installation...
Leave all default options as is and select Unzip...

Leave all default options as is and select Next...
(Step 4 from the Runtime Installation Page) Running SetConfig
-
Click the link from the Installation Page (Step 4) OR follow
instruction below to start SetConFig.

After setup has completed...
Select Start then All Programs...
Locate EasyBee Software and start SetConfig...
After Starting SetConfig

Select the ... (Browse) button


Locate the network share of Host and locate the
ProServe2012 folder...
Click ProServe.exe and select Open...
Note: You can only create a shortcut to
ProServe.exe...

If path is selected correctly, the Create Shortcut
button should be active.
Select Create Shortcut...
Close the SetConfig when completed...
...
You should now see a new shortcut on your desktop...
Double
Click
to access ProServe 2012 from this
client...
Section Three - Un-Installing ProServe 2012
(Server or Client)
Note: - you should follow instructions below in
order to un-install ProServe 2012 completely...
Un-Install ProServe 2012 Server
-
Run SetConFig and Detach
the ProServe 2012 databases...
-
Using Programs and Features under
Control Panel
- Un-Install
ProServe
2012...
-
Using SQL Server Configuration Manager -
Stop All SQL Server Services...
-
Using Windows Explorer -
Delete
the folder called SqlEasyBee...
- Start SQL Server Services backup...
Note: It's okay to leave SQL Server Express
installed on your computer, but you could also use
Programs
and Features
under Control Panel to
un-install SQL Server Express.
Un-Install ProServe 2012 Client
-
Using Programs and Features under
Control Panel
- Un-Install SetConfig...
-
You may need to Delete the
ProServe
2012
Short-Cut from your Desktop...
Don't hesitate to call us during business hours if you have
trouble installing this product...